Testing Class Libraries with C# in Visual Studio
When building a Class Library for my CS 3500 class we are required to build our own little testing suites on our machines. These tests aren’t to be uploaded to the GitHub repository for our project, but obviously it is necessary if we want to build a functioning program. As this is my first foray into the world of C# and, more importantly, Visual Studio, I found it slightly difficult to figure out out to write even rudementary Console Application tests for my Class Library. This post is to act as a reminder as to how to successfully add a ConsoleApplication Project to a solution and use it to test a Class Library.
Note: This was done using Visual Studio 2015 Enterprise and any differences in your setup is probably a result of this
Once you have your initial Class Library created with a class and method you would like to test, you will find yourself to run any tests within the same project. Due to Class Librarys compiling down to .dll files and not something like a .exe there is no way to run that project directly. Instead you need to create another project that does compile down to a .exe and have it reference your Class Library
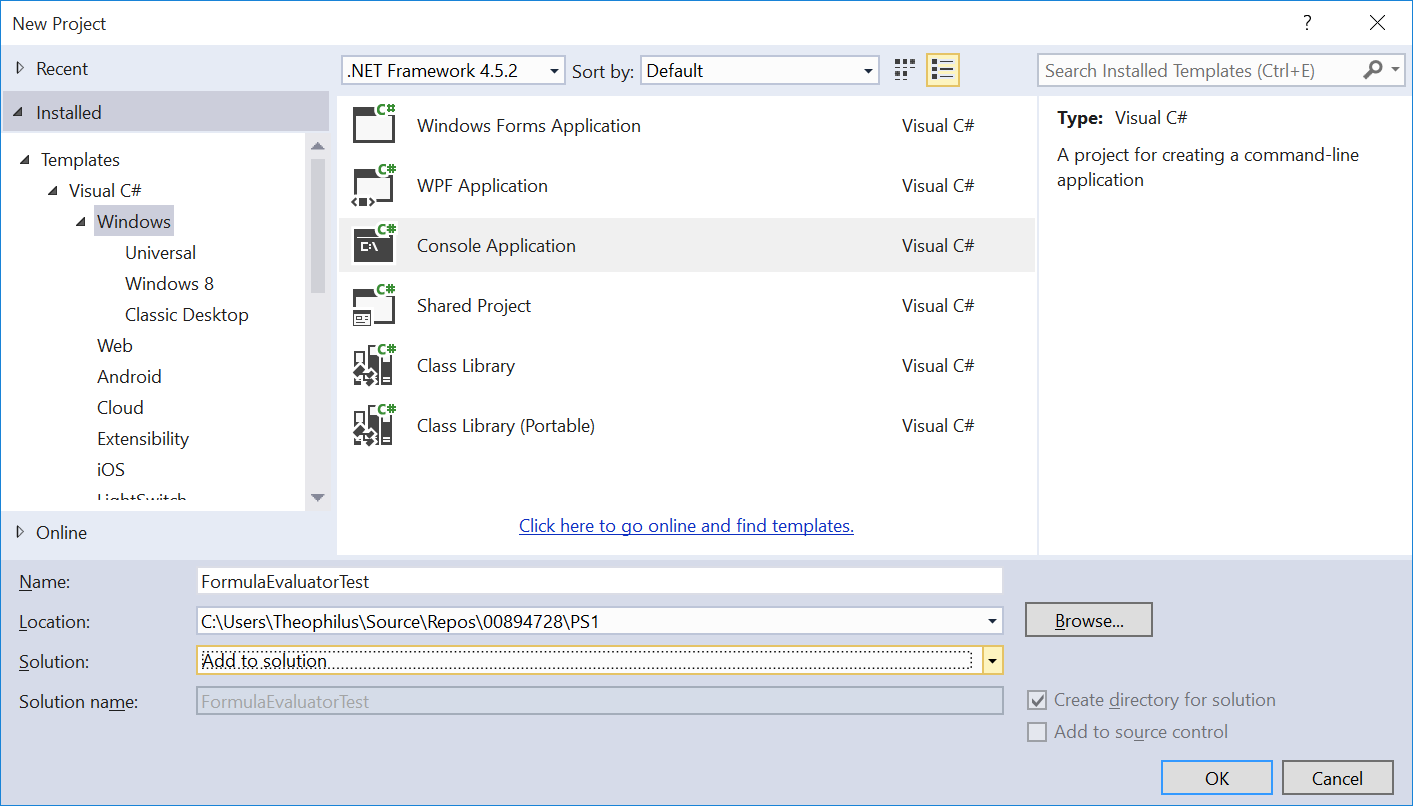
The first thing you will do is select File -> New -> Project…
In this case I am testing my project using a Console Application so I will choose Visual C# -> Windows -> Console Application as my application type.
It doesn’t matter what your project’s name is, but for simplicity I suggest using the format
Make sure it’s in the same location as your Class Library Project and add to the existing solution to ensure continuity.
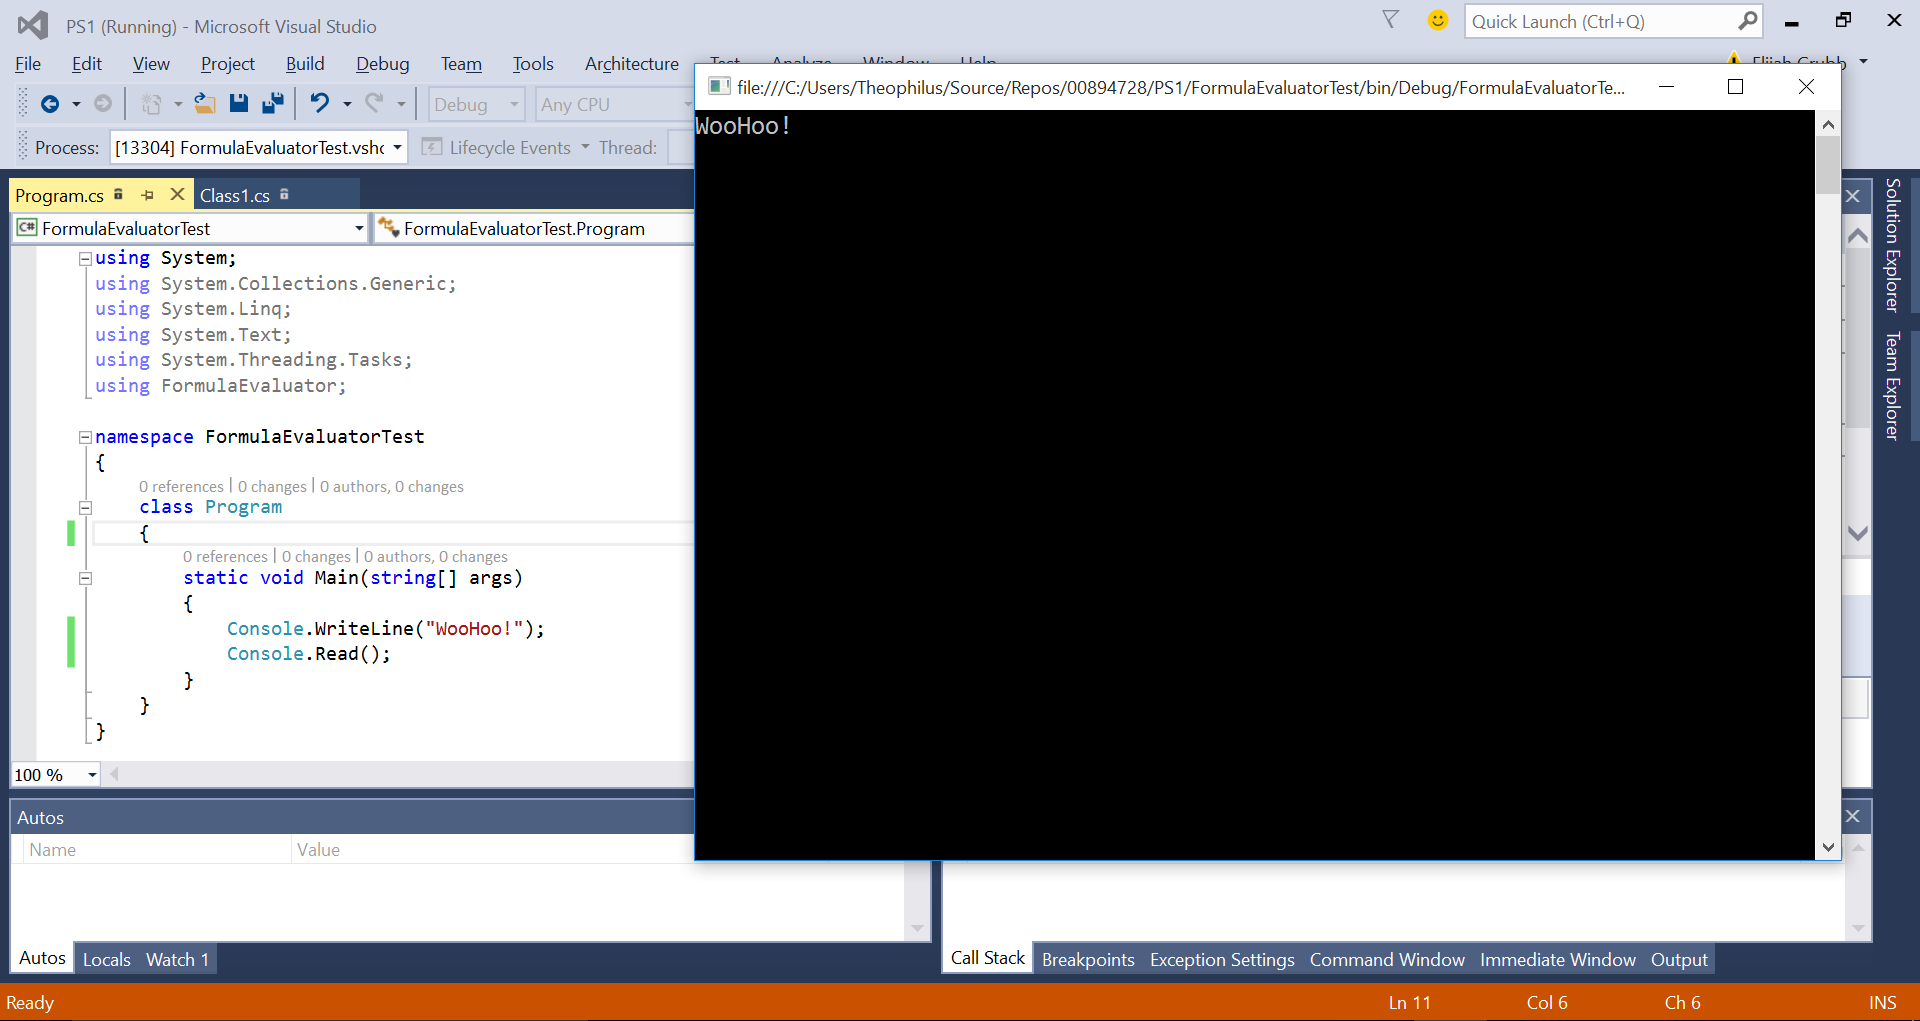
After you create this new project it will open up it’s Program.cs file which contains what this whole process is about, the Main Function. Now you have a program that can actually execute operations. However, you are not quite done.
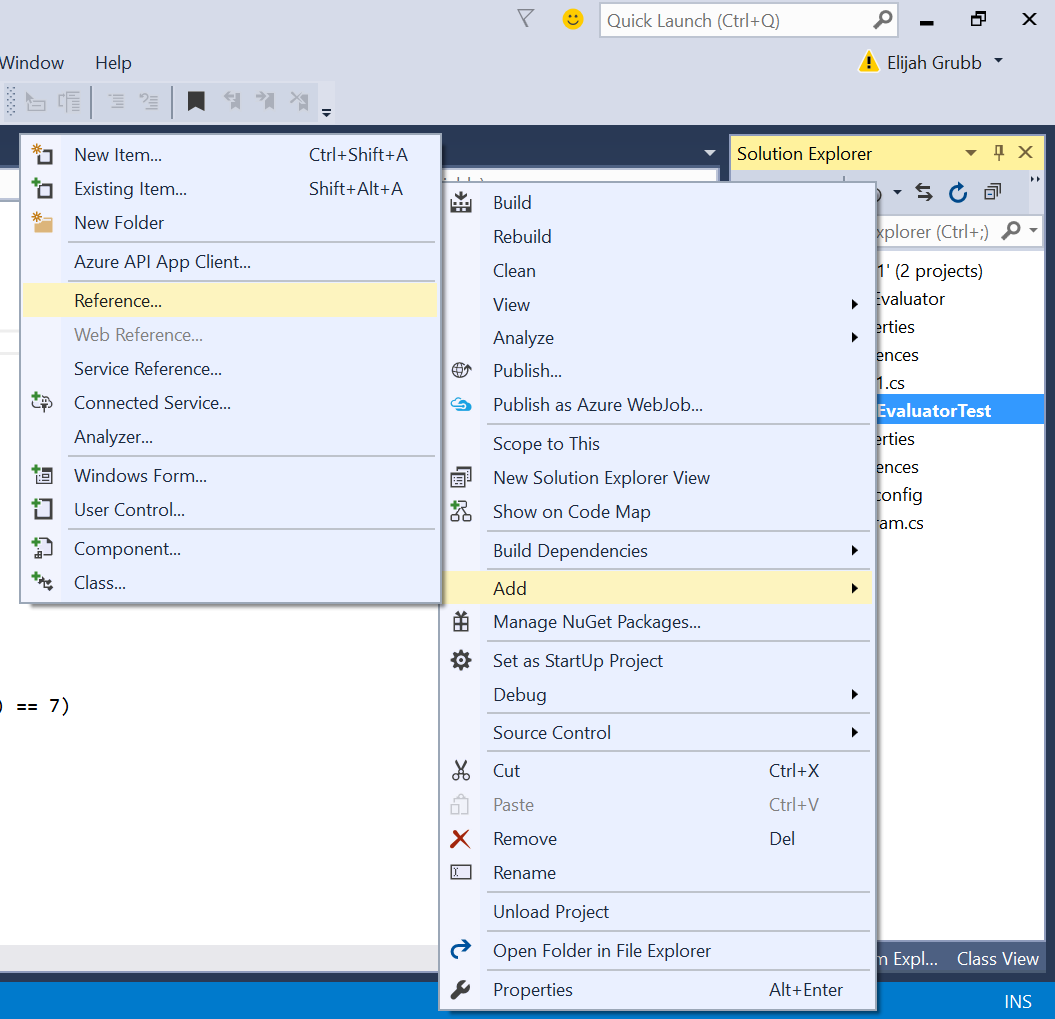
To ensure you have access to your Class Library in your new project, in the Solution Explorer right-click on your Console Application and select Add -> Reference….
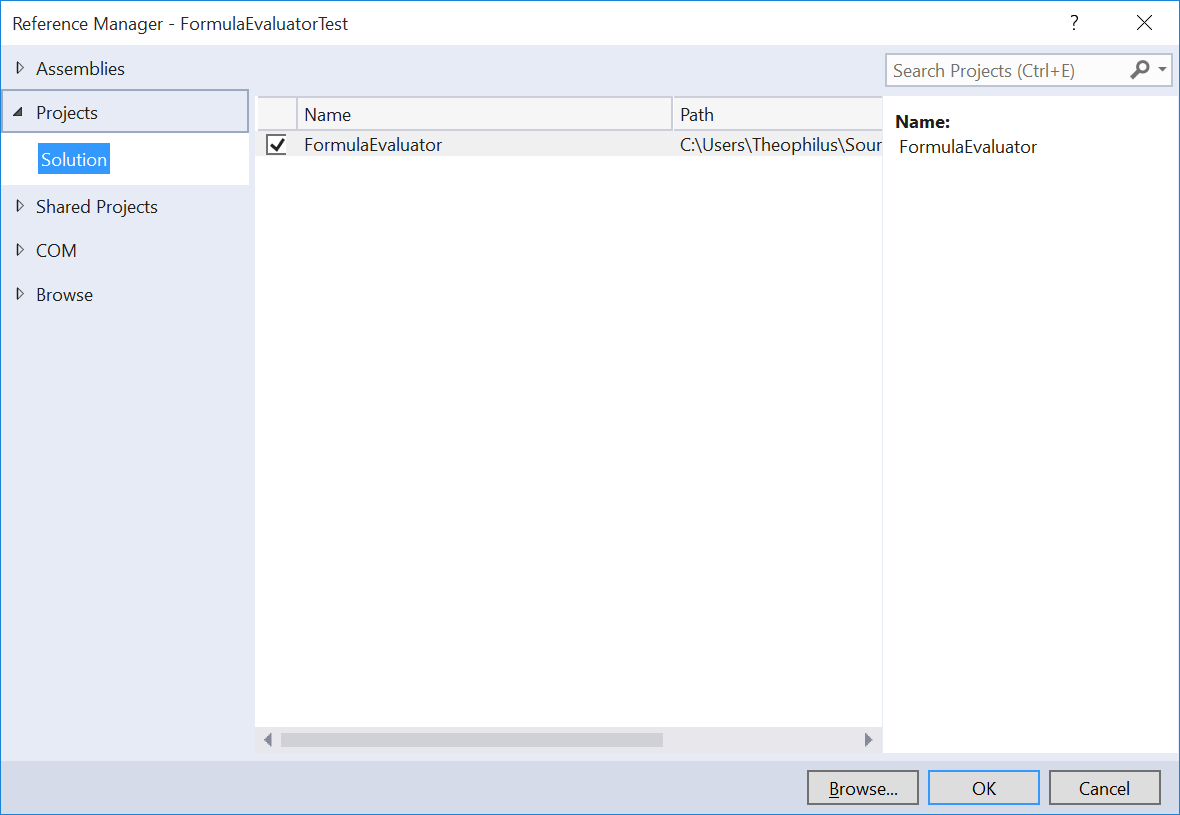
Select Projects -> Solution from the left hand column and find your Class Library in the center pane. Make sure that it’s checkbox is checked, then hit OK. You should now be able to write the line using MyClassLibrary in your console application without any errors.
You are just about done. But wait! When you attempt to run your Console Application, you probably end up with this error:
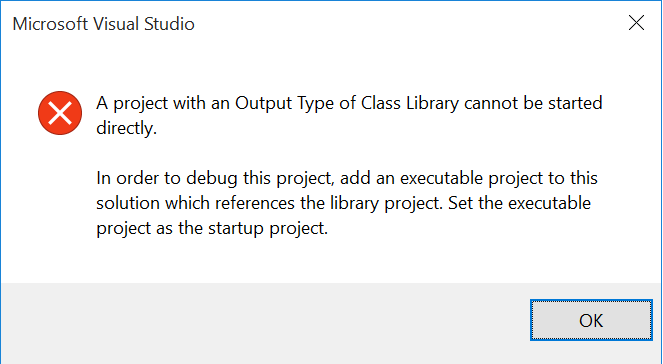
Your solution is automatically choosing your Class Library to run when you run the solution as a whole and this just doesn’t work. Like we discussed earlier, since Class Libraries compile down to a .dll file you cannot run it. You need to run the .exe file that your Console Application compiles down to.
To change this you simple right-click on your Console Application and select Set as StartUp Project
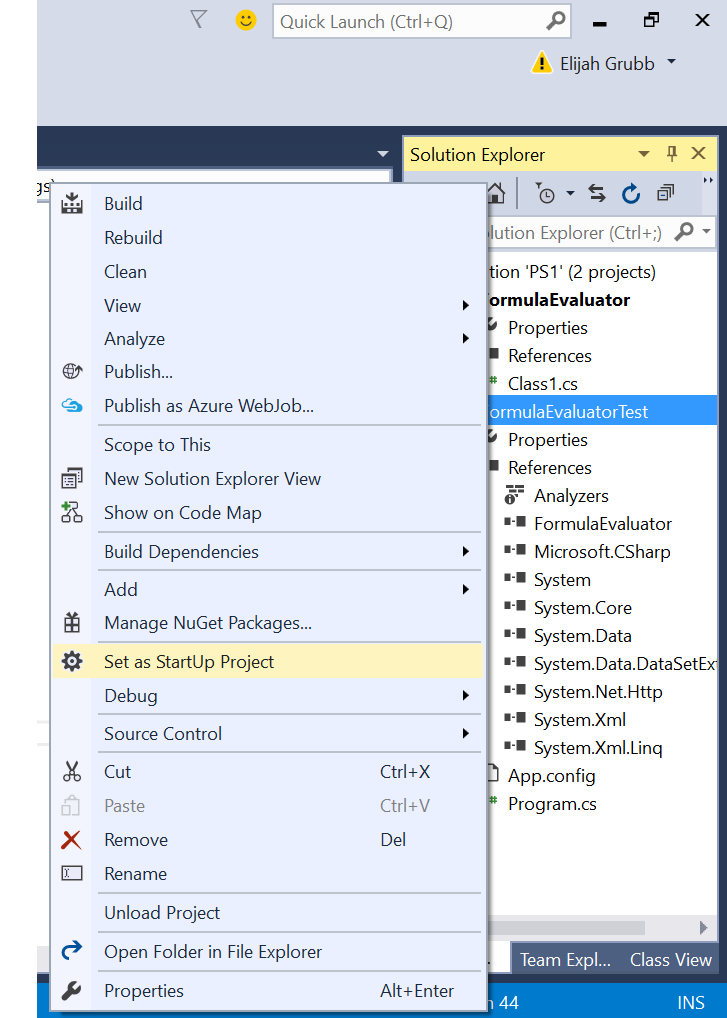
Now when you hit the Start button on the top toolbar to run your solution, it is your Console Application that will run.
Happy (C#) Hacking!
UPDATE 9/16:
I finally learned how to do this with unit tests. And I feel rather silly now that I’ve been taught. Simply replicate my process but instead of selecting a console application, select the “Tests” category on the left and choose a Unit Test Application. Unit Tests are so much better than testing with a Console Application and I’m not looking back. But that’s mainly because of how silly I feel not knowing how to use unit tests before.